Bypass Diodes

Imagine you are driving down the highway.  All the sudden, all traffic comes to a stop.  There is an accident ahead.  Luckily, there is a secondary road you can take and keep moving forward.  Without this secondary pathway, you would be stuck on the highway.  Solar modules function in the same way as above.  If there is even a little bit of shade, the flow of electricity is blocked.  By adding bypass diodes, a solar module now has multiple pathways.  This allows for the electricity to flow even if there is a blockage.

Typical solar modules will have at least three bypass diodes.  These three diodes separate the solar module into three sections.  In other words, your solar module has three pathways for electrical production.  If one section of the module is shaded from the Sun, the other two sections will still produce electricity.  This does mean the module will be reduced to 2/3 of its normal production.  However, without the bypass diodes, the production would be zero.

The question now is how these sections are created.  If you look at your solar module, you will notice silver tabs at the bottom.  And typically, there will be three separate silver tabs.  This tells you how the module is divided into sections (See figure 1).  Because of the bypass diodes, each of these sections can function independently of the other two.

What does this mean for your solar array?  If you have a location for your solar array that has some shading issues, you can still optimize that array.  Let us look at two examples:

Figure 1

Figure 1

Example1.jpg

Example one:  You have morning shade that affects the Eastern edge of your array.

In this example, it would make sense to mount your modules in portrait.  This is just like when you print a piece of paper.  The longer side of the module faces North-South.  By mounting the solar module this way, we are allowing the bypass diode to do its work.  If the Eastern edge of the array is shaded, we may lose a few sections in our modules, but the remaining sections will still produce electricity. 

Example two:  You have morning shade that will cover the bottom edge of the array.

In this example, if we mounted our array in portrait like above, we would have zero production.  This is because we have blocked every bypass diode.  Mounting the modules in landscape would be a better idea.  By doing this, you will lose roughly 1/3 of your electrical production during the shade.  But the bypass diodes still work, and you get 2/3 production.

Example2A.jpg
Example2B.jpg

Remember, when it comes to off-grid arrays, our goal is maximum production.  This allows us to have a more reliable off-grid array.  And that reliability will also translate into a longer lasting system.

Choosing the Right Module

Most of you familiar with gas generators know the need for gas.  No gas means the generator cannot run.  And that means there is no electricity to be had.  Well, a similar thing happens with any off-grid array.  At the heart of the off-grid array is the solar module.  This module is the fuel (gas) for the array.  The solar module collects energy from the sun and converts it into electricity.  The problem becomes choosing the right solar module.  And today we are going to tackle that question.

There are three major types of solar modules: Monocrystalline, Polycrystalline, and Thin Film.

Monocrystalline – if you are limited on space, this is the module for you.  Monocrystalline panels have higher efficiencies.  And the higher efficiency means that the panel provides more electricity per square foot.  This is due to their cells coming from a single crystal of pure silicon.    Typically, these modules will have solar cells that appear very dark in color.  For some, this is more pleasing to look at.  Just be warned, this panel does come with a higher price as well.

SilfabMono.jpg
PeimarPoly.jpg

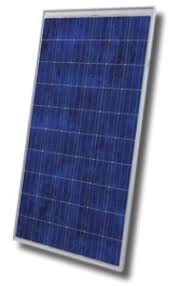
Polycrystalline – if you want a good cost module that still performs, this is the one for you.  Although these panels are not as efficient as monocrystalline, they are not far behind.  Their solar cells are made from pieces of crystal silicon.  This makes their solar cells typically appear bluer in color.  Polycrystalline is a great all-around module at a fair price.

Thin film – if you need a portable or flexible module, this is the one for you.  We are talking amorphous thin film here.  This module still uses silicon, just not in a wafer form.  Instead, the silicon is spread on a flexible material like plastic.  This allows the module to follow curved structures.  It also means that the module is less likely to get damaged due to movement.  Thin film modules work great for mobile applications.  But, of the three types, they typically have the least efficiency.

UniSolar68.png

As you can see, each solar module has its place in off-grid arrays.  And selecting them comes down to us clearly defining our goals for the off-grid array.  Remember, the goal is to create an off-grid array that best fits our individual needs. 

The Power of Inverters

Should you decide to use your Solar Array to power your electronics and appliances, you are going to need an inverter.  An inverter simply takes the DC (Direct Current) power produced by your solar panels or battery bank and inverts it into AC (Alternating Current) power.  While this seems easy enough, there are items you need to be aware of when selecting an inverter.  Here is a short list for you:

1)      Inverters come in different output types.

The two most common types of inverters are Pure Sine Wave and Modified Sine Wave.  Pure Sine Wave inverters best emulate your existing Utility Grid.  In most cases, the power from a Pure Sine Wave inverter is cleaner than the Grid.  This type of inverter is best suited when sensitive electronics are going to be used.  A Modified Sine Wave Inverter does not produce as clean of power as a Pure Sine Wave inverter.  However, a Modified Sine Wave can be more economical when power is your sole focus.

2)      Inverters are rated by Power Output

You need to select an inverter with at least the same output wattage as your maximum wattage needs.  The inverter Wattage Output is the maximum power you can get from that inverter.  For example, a 2000W inverter will output up to 2,000 watts worth of power continuously.  If you need more power than the output wattage rating, you need to choose a bigger inverter.

3)      Input DC Voltage

 The Input DC Voltage of the inverter must match the output voltage of your battery bank.  If this is not the case, the inverter will never run properly and cause damage to the inverter or the battery bank.  If your battery bank is 24 volts DC, than your inverter must have a 24 volt DC input rating.

4)      Inverter verses Inverter/Charger

Even though your goal is to solely charge the battery bank using your solar array, you may need an inverter/charger.  This type of inverter will allow you to utilize Grid power to charge your battery bank when the solar array isn’t producing energy.

Planning your project will allow you to choose the right products to meet your needs.